Optimization
We have licensed and installed optimization software on the Yens that the GSB researchers can use including Gurobi, Knitro, and AMPL. In this guide, we will show how to use the licensed optimization software interactively on the Yens, in Jupyter notebooks and in Slurm.
Software Overview
- Gurobi is a state-of-the-art mathematical optimization solver that delivers high-performance solutions for linear programming (LP), mixed-integer linear programming (MILP), quadratic programming (QP), mixed-integer quadratic programming (MIQP), and other related problems. Known for its robustness and speed, Gurobi is designed to efficiently solve large-scale optimization problems.
- Knitro is an advanced solver for nonlinear optimization. It offers algorithms for both smooth and non-smooth problems, making it particularly effective for solving large-scale, complex nonlinear problems. Knitro is well-suited for applications requiring high precision.
- AMPL (A Mathematical Programming Language) is a powerful and flexible algebraic modeling language for linear and nonlinear optimization problems. It is designed to express complex problems with simple, readable formulations. AMPL's strength lies in its ability to integrate with various solvers, including Gurobi and Knitro.
Running Software Interactively on the Yens
Gurobi
Running Gurobi in Python
First, create a new Python virtual environment using the venv package.
This virtual environment will be used across interactive Yen cluster nodes, Slurm nodes, and as a Jupyter kernel.
To ensure the virtual environment is sharable, create it in a shared location on the Yen cluster, such as a faculty project directory, rather than in a user’s home directory.
Let's navigate to the shared project directory:
cd <path/to/project>
gurobi module when we need to run code that requires Gurobi license.
We will install the python bindings via the gurobipy package without loading the module.
Create a new virtual environment, named gurobi_env:
# Make a new Python 3.10 virtual environment
/usr/bin/python3 -m venv gurobi_env
# load Python 3.11 module
ml python/3.11
# Make a new Python 3.11 virtual environment
python3 -m venv gurobi_env
You can also choose a different name instead of gurobi_env in this step.
Activate the virtual environment using the following command:
source gurobi_env/bin/activate
You should see (gurobi_env): prepended to the prompt:
(gurobi_env): $
Next, install the required python packages using pip (this step may take some time):
pip install numpy pandas ipykernel threadpoolctl scipy gurobipy
The ipykernel module is needed to turn this virtual environment into a Jupyter kernel at a later step, the threadpoolctl and scipy packages are used in the example, and the gurobipy package serves as the Python interface to Gurobi.
Gurobi is available on the Yens through multiple installed versions. To see them:
ml avail gurobi
This will show options such as:
   gurobi/8.0.1    gurobi/9.0.2    gurobi/9.5.2    gurobi/10.0.0 (D)    gurobi/11.0.3    gurobi/12.0.0

  Where:
   D:  Default Module
To run code that uses Gurobi, load the version you require:
# Load Gurobi 10 (works with default Python 3.10)
ml gurobi/10.0.0
# Load Gurobi 11 with Python 3.11
ml gurobi/11.0.3
# Load Gurobi 12 with Python 3.11
ml gurobi/12.0.0
Finally, start the Python REPL by typing python:
python
This will display:
Python 3.10.12 (main, May 27 2025, 17:12:29) [GCC 11.4.0] on linux
Type "help", "copyright", "credits" or "license" for more information.
>>>
Python 3.11.3 (main, May  6 2023, 14:52:50) [GCC 11.3.0] on linux
Type "help", "copyright", "credits" or "license" for more information.
>>>
Ensure that you can import gurobipy by running the following command:
from gurobipy import *
To exit the REPL, type:
exit()
When you are finished working interactively and want to deactivate the virtual environment and unload all modules, run the following commands:
deactivate
module purge
The environment is now set up to run your Python scripts that import gurobipy on the interactive Yen cluster nodes. Keep in mind that the module load command and virtual environment activation are only active in the current shell.
Important
You need to load the gurobi module and activate your venv environment every time you log in to the Yens before running the interactive Python scripts that use the gurobipy package.
Running Gurobi in R
Warning
The default Gurobi 10 version is not compatible with the default R 4.3 version. To ensure proper functionality, you need to use R 4.2 instead. Running ml gurobi R with an incompatible version will result in an error. For more details on which Gurobi versions work with specific R versions, please refer to the information provided here.
Similar to running Gurobi in Python, Gurobi R package is also installed and available system-wide to use on the Yens. You do not need to install anything into your user R library.
To use Gurobi software with R, simply load both modules:
ml gurobi R/4.2
To list the currently loaded modules, use:
ml
Currently Loaded Modules:
  1) gurobi/10.0.0   2) R/4.2.1
Launch interactive R:
R
Then you can load the gurobi R package:
R version 4.2.1 (2022-06-23) -- "Funny-Looking Kid"
Copyright (C) 2022 The R Foundation for Statistical Computing
Platform: x86_64-pc-linux-gnu (64-bit)

R is free software and comes with ABSOLUTELY NO WARRANTY.
You are welcome to redistribute it under certain conditions.
Type 'license()' or 'licence()' for distribution details.

R is a collaborative project with many contributors.
Type 'contributors()' for more information and
'citation()' on how to cite R or R packages in publications.

Type 'demo()' for some demos, 'help()' for on-line help, or
'help.start()' for an HTML browser interface to help.
Type 'q()' to quit R.
>
library("gurobi")
Loading required package: slam
>
You can now run the R scripts to solve the optimization problem using Gurobi on interactive Yen cluster nodes.
Important
You need to load the gurobi and R modules every time you log in to the Yens before running the interactive R scripts that use gurobi R package.
Note that if you want to use an older Gurobi version, you will need to install gurobi R package to your user R library.
Load R and the older Gurobi module:
module purge
ml R/4.2 gurobi/9.5.2
Start R by typing R:
R
Then install a personal gurobi package that links to Gurobi 9:
install.packages("/software/non-free/Gurobi/gurobi952/linux64/R/gurobi_9.5-2_R_4.2.0.tar.gz", repos=NULL)
> install.packages("/software/non-free/Gurobi/gurobi952/linux64/R/gurobi_9.5-2_R_4.2.0.tar.gz", repos=NULL)
Warning in install.packages("/software/non-free/Gurobi/gurobi952/linux64/R/gurobi_9.5-2_R_4.2.0.tar.gz",  :
  'lib = "/software/free/R/R-4.2.1/lib/R/library"' is not writable
Would you like to use a personal library instead? (yes/No/cancel) yes
Would you like to create a personal library
‘/home/users/$USER/R/x86_64-pc-linux-gnu-library/4.2’
to install packages into? (yes/No/cancel) yes
* installing *binary* package ‘gurobi’ ...
* DONE (gurobi)
library("gurobi")
Loading required package: slam
>
Quit R. You can now run the R scripts to solve the optimization problem using Gurobi on interactive Yen cluster nodes.
AMPL with Knitro Solver
Running AMPL with Knitro Solver in Python
Because the Yens already have Knitro and AMPL software installed, we simply need to load the appropriate modules.
Load both modules:
ml ampl knitro
You can check currently loaded modules with:
ml
Currently Loaded Modules:
  1) ampl/20231031   2) knitro/14.0.0
You can get details about a specific module with:
ml show knitro
which displays useful details about PATH modifications when the module is loaded:
---------------------------------------------------------------------------------------------------------------------
   /software/modules/Core/knitro/14.0.0.lua:
---------------------------------------------------------------------------------------------------------------------
whatis("Name:        knitro")
whatis("Version:     14.0.0")
whatis("Category:    math, optimization")
whatis("URL:         https://www.artelys.com/en/optimization-tools/knitro")
whatis("Description: Artelys Knitro is an optimization solver for difficult large-scale nonlinear problems.")
pushenv("KNITRODIR","/software/non-free/knitro/14.0.0")
pushenv("ARTELYS_LICENSE_NETWORK_ADDR","srcc-license-srcf.stanford.edu")
prepend_path("PATH","/software/non-free/knitro/14.0.0/knitroampl")
prepend_path("LIBRARY_PATH","/software/non-free/knitro/14.0.0/lib")
prepend_path("LD_LIBRARY_PATH","/software/non-free/knitro/14.0.0/lib")
prepend_path("CPATH","/software/non-free/knitro/14.0.0/include")
prepend_path("MATLABPATH","/software/non-free/knitro/14.0.0/knitromatlab")
prepend_path("PYTHONPATH","/software/non-free/knitro/14.0.0/examples/Python")
Next, create a new Python virtual environment using the venv package.
This virtual environment will also be used across interactive Yen cluster nodes, Slurm nodes, and as a Jupyter kernel. The process is the same as the one we set up for Gurobi above.
To ensure the virtual environment is sharable, create it in a shared location on the Yen cluster, such as a faculty project directory, rather than in a user’s home directory.
Let's navigate to the shared project directory:
cd <path/to/project>
Create a new virtual environment, named opt:
/usr/bin/python3 -m venv opt
opt in this step.
Next, activate the virtual environment using the following command:
source opt/bin/activate
You should see (opt): prepended to the prompt:
(opt): $
Finally, install the required python packages using pip (this step may take some time):
pip install numpy pandas ipykernel amplpy
The ipykernel module is needed to turn this virtual environment into a Jupyter kernel at a later step and the amplpy package serves as the Python interface to AMPL.
We can now use both AMPL and Knitro on interactive Yen cluster nodes. After the packages are installed, start the Python REPL by typing python:
python
This will display:
Python 3.10.12 (main, Sep 11 2024, 15:47:36) [GCC 11.4.0] on linux
Type "help", "copyright", "credits" or "license" for more information.
>>>
Ensure that you can import amplpy and verify that AMPL is accessible and the license is a network floating license by running the following code. You can save it to knitro_test.pyand run it in the terminal:
| knitro_test.py | |
|---|---|
1 2 3 4 5 6 7 8 9 10 11 12 13 14 15 16 17 18 19 20 21 22 23 24 25 26 27 28 29 30 31 32 33 34 | |
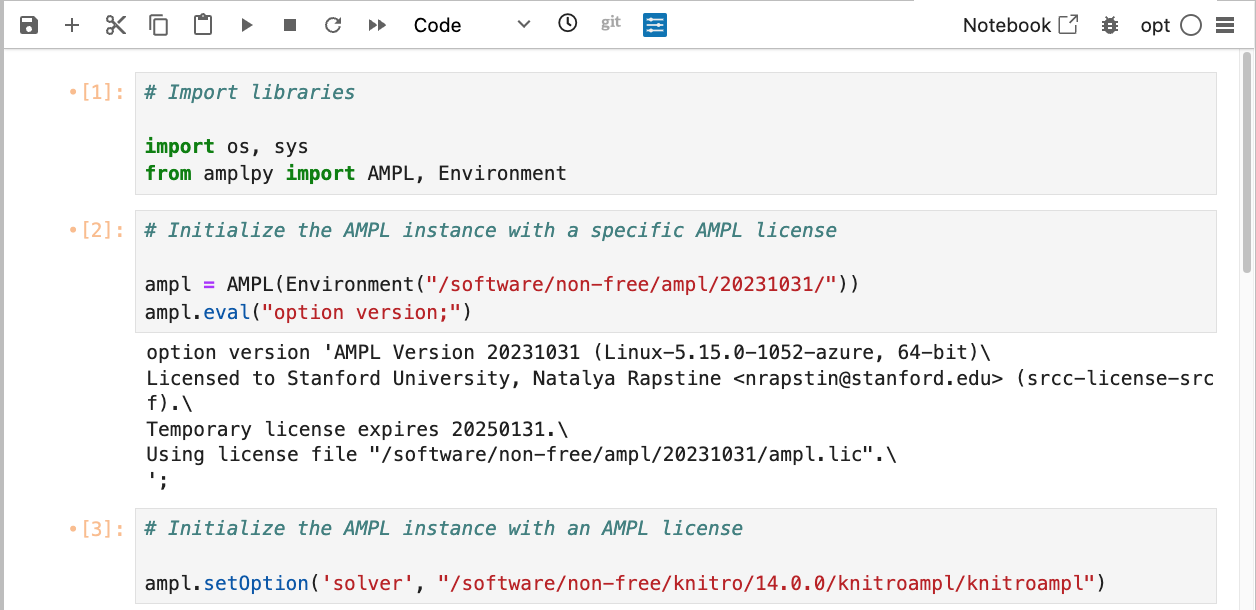
We point to the AMPL floating network license with AMPL(Environment("/software/non-free/ampl/20231031")) call.
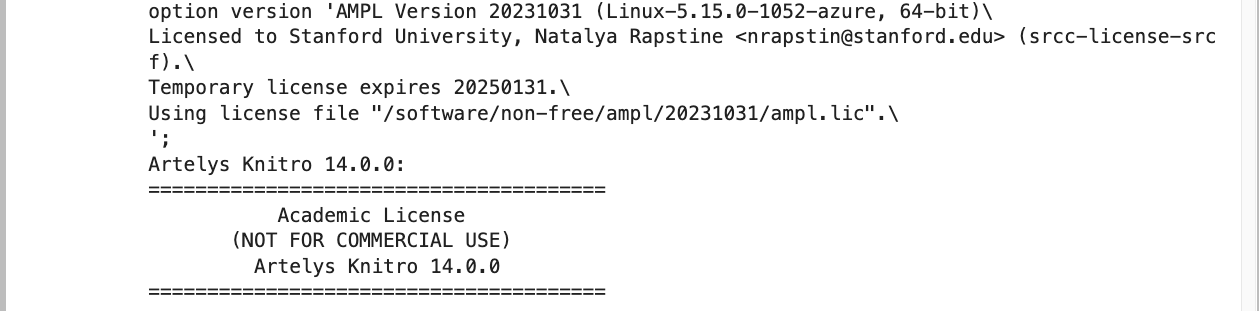
The ampl.eval() call should indicate that we have checked out the license:
option version 'AMPL Development Version 20231213 (Linux-5.15.0-1052-azure, 64-bit)\
Licensed to Stanford University, Natalya Rapstine <nrapstin@stanford.edu> (srcc-license-srcf).\
Temporary license expires 20250131.\
Using license file "/software/non-free/ampl/20231031/ampl.lic".\
';
Warning
To ensure that the AMPL instance is always properly released (even in cases of errors or exceptions), we must properly close ampl instance. The try and finally logic does that in which we release the AMPL license with ampl.close() call. Be sure to shut down the Jupyter kernel when using AMPL in a Jupyter notebook, as only one floating license is available.
We also point to the Knitro license on the Yens with ampl.setOption() call.
After defining the problem, the ampl.solve() call should print out the Knitro license information and the problem solution.
=======================================
           Academic License
       (NOT FOR COMMERCIAL USE)
         Artelys Knitro 14.0.0
=======================================

No start point provided -- Knitro computing one.

Knitro presolve eliminated 0 variables and 0 constraints.

concurrent_evals:        0
datacheck:               0
hessian_no_f:            1
The problem is identified as an LP.
To exit the REPL, type:
exit()
When you are finished working interactively and want to deactivate the virtual environment and unload all modules, run the following commands:
deactivate
module purge
The environment is now set up to run your Python scripts that use AMPL and Knitro on the interactive Yen cluster nodes. Keep in mind that the module load command and virtual environment activation are only active in the current shell.
Important
You need to load the ampl and knitro modules and activate your venv environment every time you log in to the Yens before running the interactive Python scripts that use AMPL and Knitro.
Knitro
Running Knitro in R
To use Knitro software with R, start by loading both modules:
ml knitro R
This will load the default versions of both modules. To list the currently loaded modules, use:
ml
Currently Loaded Modules:
  1) knitro/14.0.0   2) R/4.3.0
To use Knitro within R, we will need to install this KnitroR package. This package is provided alongside the Knitro software by the developer and you can retrieve your own copy of it with the following command:
cp -r /software/non-free/knitro/14.0.0/examples/R/KnitroR ~/KnitroR
This copies the package to your home directory, from which you can now install it within R.
Launch interactive R and install the package from your home directory:
R
R version 4.3.0 (2023-04-21) -- "Already Tomorrow"
Copyright (C) 2023 The R Foundation for Statistical Computing
Platform: x86_64-pc-linux-gnu (64-bit)

R is free software and comes with ABSOLUTELY NO WARRANTY.
You are welcome to redistribute it under certain conditions.
Type 'license()' or 'licence()' for distribution details.

R is a collaborative project with many contributors.
Type 'contributors()' for more information and
'citation()' on how to cite R or R packages in publications.

Type 'demo()' for some demos, 'help()' for on-line help, or
'help.start()' for an HTML browser interface to help.
Type 'q()' to quit R.
>
install.packages("~/KnitroR", repos = NULL, type = "source")
You can now load the package and run a test to confirm that knitro is working:
library(KnitroR)
knitro(objective = function(x) x[1] * x[2], x0 = c(1,1))
=======================================
           Academic License
       (NOT FOR COMMERCIAL USE)
         Artelys Knitro 14.0.0
=======================================

Knitro performing finite-difference gradient computation with 1 thread.
Knitro presolve eliminated 0 variables and 0 constraints.

concurrent_evals:        0
The problem is identified as unconstrained.

Problem Characteristics                                 (   Presolved)
-----------------------
Objective goal:  Minimize
Objective type:  general
Number of variables:                                  2 (           2)
    bounded below only:                               0 (           0)
    bounded above only:                               0 (           0)
    bounded below and above:                          0 (           0)
    fixed:                                            0 (           0)
    free:                                             2 (           2)
Number of constraints:                                0 (           0)
    linear equalities:                                0 (           0)
    quadratic equalities:                             0 (           0)
    gen. nonlinear equalities:                        0 (           0)
    linear one-sided inequalities:                    0 (           0)
    quadratic one-sided inequalities:                 0 (           0)
    gen. nonlinear one-sided inequalities:            0 (           0)
    linear two-sided inequalities:                    0 (           0)
    quadratic two-sided inequalities:                 0 (           0)
    gen. nonlinear two-sided inequalities:            0 (           0)
Number of nonzeros in Jacobian:                       0 (           0)
Number of nonzeros in Hessian:                        0 (           3)

Knitro using the Interior-Point/Barrier Direct algorithm.

  Iter      Objective      FeasError   OptError    ||Step||    CGits
--------  --------------  ----------  ----------  ----------  -------
       0    1.000000e+00   0.000e+00
       1    0.000000e+00   0.000e+00   0.000e+00   1.414e+00        0

EXIT: Locally optimal solution found.

Final Statistics
----------------
Final objective value               =   0.00000000000000e+00
Final feasibility error (abs / rel) =   0.00e+00 / 0.00e+00
Final optimality error  (abs / rel) =   0.00e+00 / 0.00e+00
# of iterations                     =          1
# of CG iterations                  =          0
# of function evaluations           =          8
# of gradient evaluations           =          0
Total program time (secs)           =       0.07083 (     0.036 CPU time)
Time spent in evaluations (secs)    =       0.00001

===============================================================================

$status
[1] 0

$obj
[1] 0

$x
[1] 0 0

$lambda
[1] 0 0

$objGrad
[1] 0 0

$objGradIndexVars
[1] 0 1

$c
NULL

$r
NULL

$jac
NULL

$jacIndexCons
NULL

$jacIndexVars
NULL

$rsdJac
NULL

$rsdJacIndexRsds
NULL

$rsdJacIndexVars
NULL

$numFCevals
[1] 8

$numGAevals
[1] 0

$numHevals
[1] 0

$numHVevals
[1] 0

$numIters
[1] 1

$numCGiters
[1] 0
Quit R. You can now utilize the KnitroR package in your R scripts and within RStudio on JupyterHub, provided that you are using the same version of R as the one used during installation.
Note that if you are using this package within RStudio on JupyterHub, you will need to set a couple of environment variables to get the package to work:
Sys.setenv(KNITRODIR = '/software/non-free/knitro/14.0.0')
Sys.setenv(ARTELYS_LICENSE_NETWORK_ADDR = 'srcc-license-srcf.stanford.edu')
Integrating with Jupyter Notebooks
Running Gurobi in Jupyter Notebooks
To make Gurobi Python interface work on the Yen's JupyterHub, we can take our gurobi_env virtual environment and make it into a Jupyter kernel.
Activate the virtual environment in your project space:
cd <path/to/project>
source gurobi_env/bin/activate
Then, we add the active gurobi_env virtual environment as a new JupyterHub kernel and name it as gurobi_env:
ml gurobi
source gurobi_env/bin/activate
python -m ipykernel install --user --name=gurobi_env \
--env GUROBI_HOME ${GUROBI_HOME} \
--env GRB_LICENSE_FILE ${GUROBI_HOME}/gurobi.lic \
--env PATH ${GUROBI_HOME}/bin:${PATH} \
--env LD_LIBRARY_PATH ${GUROBI_HOME}/lib:${LD_LIBRARY_PATH}
# don't load gurobi module, it might mess with python path
source gurobi_env/bin/activate
python -m ipykernel install --user --name=gurobi_env \
--env GUROBI_HOME /software/non-free/Gurobi/gurobi1103/linux64 \
--env GRB_LICENSE_FILE /software/non-free/Gurobi/gurobi1103/linux64/licenses/gurobi.lic \
--env PATH /software/non-free/Gurobi/gurobi1103/linux64/bin:${PATH} \
--env LD_LIBRARY_PATH /software/non-free/Gurobi/gurobi1103/linux64/lib:${LD_LIBRARY_PATH}
# don't load gurobi module, it might mess with python path
source gurobi_env/bin/activate
python -m ipykernel install --user --name=gurobi_env \
--env GUROBI_HOME /software/non-free/Gurobi/gurobi1200/linux64 \
--env GRB_LICENSE_FILE /software/non-free/Gurobi/gurobi1200/linux64/licenses/gurobi.lic \
--env PATH /software/non-free/Gurobi/gurobi1200/linux64/bin:${PATH}' \
--env LD_LIBRARY_PATH /software/non-free/Gurobi/gurobi1200/linux64/lib:${LD_LIBRARY_PATH}'
Notice the extra --env arguments to add necessary Gurobi environment variables so that Jupyter kernel can find the software. List all of your Jupyter kernels with the following command:
jupyter kernelspec list
To remove a kernel, run:
jupyter kernelspec uninstall <kernel-name>
where <kernel-name> is the name of the kernel you want to uninstall from JupyterHub.
On JupyterHub, launch the new gurobi_env kernel and test the package imports:

Running AMPL/Knitro in Jupyter Notebooks
To make AMPL/Knitro Python interface work on the Yen's JupyterHub, we can take our opt virtual environment and make it into a Jupyter kernel.
Load AMPL and Knitro modules:
ml ampl knitro
Activate the virtual environment in your project space:
cd <path/to/project>
source opt/bin/activate
Then, we add the active opt virtual environment as a new JupyterHub kernel and name it as opt:
python -m ipykernel install --user --name=opt \
--env KNITRODIR /software/non-free/knitro/14.0.0 \
--env ARTELYS_LICENSE_NETWORK_ADDR srcc-license-srcf.stanford.edu \
--env LD_LIBRARY_PATH '/software/non-free/knitro/14.0.0/lib:${LD_LIBRARY_PATH}' \
--env PYTHONPATH '/software/non-free/knitro/14.0.0/examples/Python:${PYTHONPATH}'
Notice the extra --env arguments to add necessary Knitro and AMPL environment variables so that Jupyter kernel can find the licenses. Launch the new opt kernel and test the ampl and knitro imports.
Combining Gurobi, Knitro, and AMPL in a Single Kernel
Consider combining the instructions for Gurobi and AMPL/Knitro to make a single "optimization" virtual environment and Jupyter kernel. After loading gurobi, ampl and knitro modules, make the virtual environment, activate it, then pip install all the required packages - numpy pandas ipykernel threadpoolctl scipy gurobipy amplpy.
You can then make that active virtual environment into a new Jupyter kernel combining the environment variables we used previously and name it as opt_combined:
python -m ipykernel install --user --name=opt_combined \
--env GUROBI_HOME /software/non-free/Gurobi/gurobi1000/linux64 \
--env GRB_LICENSE_FILE /software/non-free/Gurobi/gurobi1000/linux64/gurobi.lic \
--env KNITRODIR /software/non-free/knitro/14.0.0 \
--env ARTELYS_LICENSE_NETWORK_ADDR srcc-license-srcf.stanford.edu \
--env LD_LIBRARY_PATH '/software/non-free/knitro/14.0.0/lib:${LD_LIBRARY_PATH}' \
--env PATH '/software/non-free/Gurobi/gurobi1000/linux64/bin:${PATH}' \
--env PYTHONPATH '/software/non-free/knitro/14.0.0/examples/Python:${PYTHONPATH}'
On JupyterHub, launch the new opt_combined kernel and test the package imports for amplpy, gurobipy and all other previous imports.
Note
Since we already have a Jupyter kernel named opt, we chose a different name opt_combined for the combined Gurobi, AMPL and Knitro kernel. If you choose the same kernel name opt, the opt kernel will be overwritten to reference the latest kernel install from the active environment.
Running Software on Slurm
Running Batch Jobs
To use the optimization software on the Yen Slurm cluster, we first need to load the required modules and activate the virtual Python environment before calling python in the Slurm script. Let's save the following Slurm script to a file named opt_test.slurm:
| opt_test.slurm | |
|---|---|
1 2 3 4 5 6 7 8 9 10 11 12 13 14 15 16 17 18 19 20 21 22 23 24 | |
In this example, we load all three optimization software, but you can omit the ones you don't need.
Submit this Slurm script to test:
sbatch opt_test.slurm
See your job in the queue:
squeue
Display the .out file once the job is done.
cat *.out
Running Job Arrays
A Slurm job array is a way to launch multiple jobs in parallel. One use case is when you want to change input parameters in your script (such as a Python, Julia, or R script). Instead of manually changing the input parameters and rerunning the script multiple times, you can achieve this with a single job array.
Gurobi Example
We will work with the following Python script that was modified from Gurobi documentation that performs sensitivity analysis using the Gurobi optimization library.
Specifically, this script formulates and solves a simple Mixed Integer Programming (MIP) model using the Gurobi matrix API:
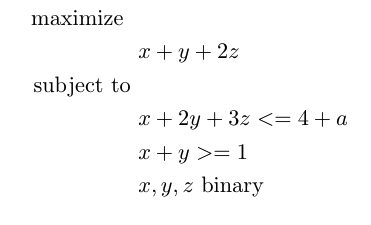
Save this Python script to a new file named gurobi_sensitivity.py.
| gurobi_sensitivity.py | |
|---|---|
1 2 3 4 5 6 7 8 9 10 11 12 13 14 15 16 17 18 19 20 21 22 23 24 25 26 27 28 29 30 31 32 33 34 35 36 37 38 39 40 41 42 43 44 45 46 47 48 49 50 51 52 53 54 55 56 57 58 59 60 61 | |
This Python script can be run with python gurobi_sensitivity.py with no command line argument (a is set to 0 by default). However, we will run it via the scheduler on the Yen Slurm cluster.
Here is an example Slurm script, that loads gurobi module, activates venv, and runs gurobi_sensitivity.py script. Save this Slurm script to a file named sensitivity_analysis.slurm:
| sensitivity_analysis.slurm | |
|---|---|
1 2 3 4 5 6 7 8 9 10 11 12 13 14 15 16 17 18 19 20 21 22 23 24 25 | |
You will need to modify the path to your venv enviroment as well as your email address. After that, you can submit the script to run with sbatch sensitivity_analysis.slurm
Next, we will modify this Slurm script to run as a job array. Each task in a job array will run the same Python script with a unique argument.
We will pass an index as a command line argument to the Python script, which performs sensitivity analysis. The Python script will set the value of a based on the corresponding array element. For example, if we run the Python script with the argument 5, the script will assign the value corresponding to the 5th element in the user-defined capacity coefficient array.
We also want to ensure that we limit the threads to 1 in both numpy and gurobi since we will be launching one task per CPU core. The following lines in the Python script accomplish this:
| gurobi_sensitivity.py | |
|---|---|
8 9 10 11 12 | |
Now, our Slurm script should look like below. Save this to sensitivity_analysis_array.slurm:
| sensitivity_analysis_array.slurm | |
|---|---|
1 2 3 4 5 6 7 8 9 10 11 12 13 14 15 16 17 18 19 20 21 22 23 24 25 26 | |
Again, you will have to modify the script to use your venv environment and your email.
Note that in this case, we specify Slurm option #SBATCH --array=0-31 to run 32 tasks in parallel. The maximum job array index is 511 (--array=0-511) on Yen Slurm. All tasks will be launched as independent jobs. There is a limit of 512 concurrent jobs per user that could be running at the same time. Each task will generate a unique log file gurobi-%A-%a.out where %A will be the unique job ID and %a will be the unique task ID (from 0 to 31).
You can see the limits for the normal partition with:
sacctmgr show qos normal
MaxSubmitPU and MaxJobsPU columns which list the maximum number of jobs allowed to be submitted by a user and the maximum number of jobs that can be running at the same time, respectively.
After modifying the path to your venv environment, submit the sensitivity_analysis_array.slurm script to the scheduler to run the job array on the cluster. It will launch all 32 tasks at the same time (some might sit in the queue while others are going to run right away). To submit, run:
sbatch sensitivity_analysis_array.slurm
Monitor your jobs with watch squeue -u $USER where $USER is your SUNet ID. Identify any failed job array tasks and rerun them by setting --array= to include only the failed indices.